Working with the server (user)
Server configurations
Address            : mtt-mme.3me.tudelft.nl
CPU                : Intel (R) Xeon(R) Gold 5218 CPU @ 2.30GHz
CPU(s)             : 32
Thread(s) per core : 1
Core(s) per socket : 16
Socket(s)          : 2
RAM                : 192 GB
GPU                : Tesla V100S PCIe 32GB
Accessing the server
To access the server you need to be either on campus or connected to VPN.
In case you are not at the campus, donwload and install EduVPN.
Configuring SSH client
Credentials
There are multiple ways to access the server via SSH. If you are on Mac OS or Linux, enter the following in the terminal:
ssh USER_NAME@mtt-mme.3me.tudelft.nl
Where USER_NAME is your first name in lower case. For example:
ssh bilge@mtt-mme.3me.tudelft.nl
Configuring SSH in Windows
If you are on Windows, you can:
- Use a SSH client (e.g., PuTTy, Bitvise);
- Install the Windows Subsystem for Linux (WSL) and use SSH in the windows terminal;
- Install SSH in PowerShell (tutorial);
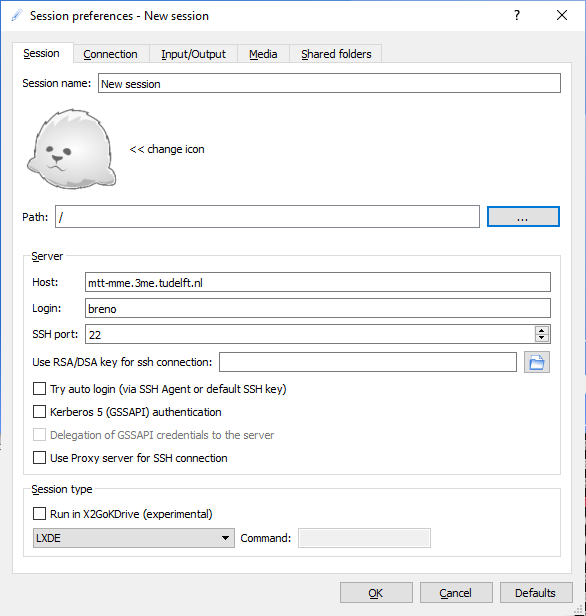
- Install X2Go client to use a graphical remote desktop (see tutorial).
When using X2Go, change Session type to LXDE (see below):
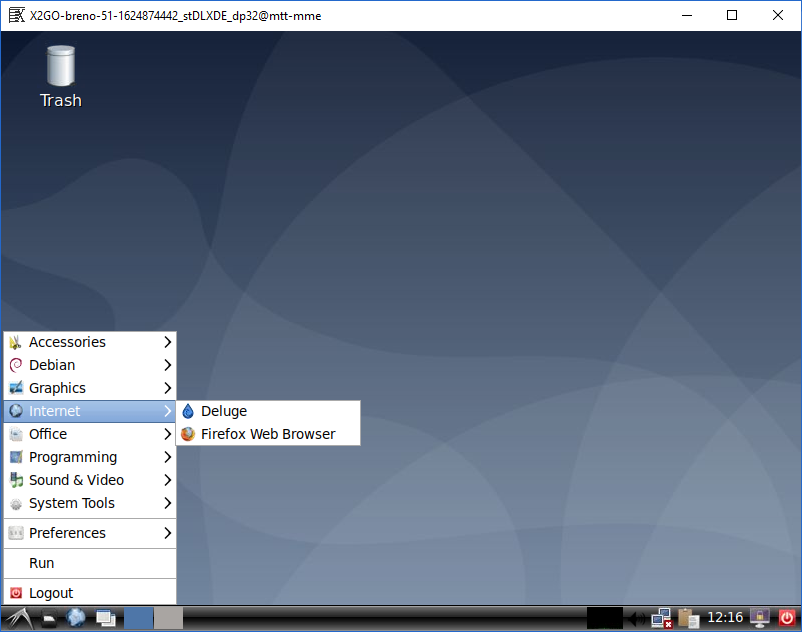
The desktop environment looks like:
First login?
If your are loging in for the first time, the password will be your TU Delft email account including the @ sign (e.g., B.Atasoy@).
After your first login, your will be asked to change your password.
File transfer
Transfer files to the server via SFTP-SSH using:
For example, to copy the file A.txt stored locally in C:/Users/USER_NAME/Downloads/ to the server folder ~/target_folder using scp execute:
scp C:/Users/USER_NAME/Downloads/A.txt USER_NAME@mtt-mme.3me.tudelft.nl:~/target_folder
*Note: ~/ is your home location and the colon (:) is how scp distinguish between local and remote locations.
File download
To download a file to the current folder, use the command wget. For example:
wget https://repo.anaconda.com/archive/Anaconda3-2021.05-Linux-x86_64.sh
Extracting files
To extract a .tar.gz file, type:
tar -xvf archive.tar.gz
Parameters (see more):
- x = extract
- v = visible (show files extracted)
To extrac a .gz file, type:
gzip -dk archive.gz
Parameters (see more):
- d = decompress
- k = keep .gz file
-
Executing your code
To guarantee an even distribution of computing resources, please run your code using the Slurm workload manager. A detailed tutorial on how to create jobs and organize your project can be found here and here.
Example: running model on several instances
Consider your project is saved on your $HOME directory and is structured as follows:
project
|    README.md
│    model.py
│
└─── instances
│   │   input_01.csv
│   │   input_02.csv
│   |   ...
|   |   input_10.csv
|
└─── results
Further, consider you aim to:
- Run your model (
project/model.py) on a series of input files saved inproject/instances; - Write the results separately to the folder
project/results.
To carry out this task (i.e., run model.py on all instances) you can:
- Send a single job where all instances are looped inside
model.py. - Send several individual jobs, one for each instance.
Strategy 2. is generally better since the server can deal with several jobs in parallel. For several alternatives to send python, visit this tutorial.
In the following we detail how to execute a single instance in the server.
Model example
First, consider the following example of a model:
#!/usr/bin/env python3
import sys
import time

path_input = sys.argv[1]
path_output = sys.argv[2]

print(f"Started processing instance '{path_input}'.")
f = open(path_output, "a")

print("Running model...")
for i in range(1, 6):
    time.sleep(1)
    print(f"Processed complex math from step {i}...")
    f.write(f"Intermediate results from step {i}.\n")

f.close()

print(f"Finished processing instance. Results saved to '{path_output}'.")
This model receives two parameters, namely:
- The path of the input data (
path_input); - The path of the results’ file (
path_output).
Then, it simulates a five-step, computational expensive process and saves the results.
To run the model on input_01.csv type:
python3 model.py $HOME/project/instances/input_01.csv $HOME/project/output/output_01.txt
This line executes model.py passing as parameters the input data ($HOME/project/instances/input_01.csv) and the target output file ($HOME/project/output/output_01.txt).
The console logging looks like:
Started processing instance '/home/breno/project/instances/input_01.csv'.
Running model...
Processed complex math from step 1...
Processed complex math from step 2...
Processed complex math from step 3...
Processed complex math from step 4...
Processed complex math from step 5...
Finished processing instance. Results saved to '/home/breno/project/output/output_01.txt'.
The target file output_01.txt stores:
Intermediate results from step 1.
Intermediate results from step 2.
Intermediate results from step 3.
Intermediate results from step 4.
Intermediate results from step 5.
Job basic settings
To submit your model, you need to configure a Slurm job submission file. You can use the following basic settings:
#!/bin/bash
#SBATCH --job-name=serial_job_test          # Job name
#SBATCH --mail-type=END,FAIL                # Mail events (NONE, BEGIN, END, FAIL, ALL)
#SBATCH --mail-user=b.atasoy@tudelft.nl     # Where to send mail
#SBATCH --ntasks=1                          # Run on a single CPU
#SBATCH --mem=1gb                           # Job memory request
#SBATCH --time=00:05:00                     # Time limit hrs:min:sec
#SBATCH --output=serial_test_%j.log         # Standard output and error log
Executing one instance
To process file input_01.csv, first create a job file (e.g., job_01.job):
touch job_01.job # Create empty file
Then, copy the following information to job_01.job (tip: on terminal, use nano or vi):
#!/bin/bash
#SBATCH --job-name=serial_job_test          # Job name
#SBATCH --mail-type=END,FAIL                # Mail events (NONE, BEGIN, END, FAIL, ALL)
#SBATCH --mail-user=b.atasoy@tudelft.nl     # Where to send mail
#SBATCH --ntasks=1                          # Run on a single CPU
#SBATCH --mem=1gb                           # Job memory request
#SBATCH --time=00:05:00                     # Time limit hrs:min:sec
#SBATCH --output=serial_test_%j.log         # Standard output and error log

python3 model.py $HOME/project/instances/input_01.csv $HOME/project/output/output_01.txt
Finally, send the job to be processed:
sbatch job_01.job
Checking job status
In the following, some useful Slurm commands for checking your jobs (see more here):
# See the entire job queue
squeue

# See only jobs for a given user
squeue -u username